Forgotten Son: The Birthplace of President James Monroe

By Jeffrey Carl

From Legacy Magazine, January 2003

Nearly ten years ago, I spent a college summer as a reporter for the county newspaper in rural Westmoreland County, Virginia. Westmoreland, nestled in the “northern neck” of Virginia between the Potomac and the Rappahannock rivers, is blessed with an enviable surplus of historical sites. 

James Monroe birthplace monument, January 2003

Almost anywhere, the birthplace of a president would be marked as a site of significant historical importance and tourism interest. But Westmoreland boasts the birthplaces of George Washington and Robert E. Lee (both of whom have lavish commemorative historical sites). In a county with an abundance of historical favorite sons, former President James Monroe finishes as a distant third place. In the summer of 1994, I was assigned a story about a barely-noticed granite marker and state historical signpost on a roadside, dedicated to the birthplace of perhaps the most overlooked of America’s founding fathers.

James Monroe was born on April 28, 1758 on a 505-acre plantation near what is today Colonial Beach, Virginia.  He left at age 16 to attend the College of William and Mary, then quit school to join the army when the Revolutionary War broke out. Monroe facilitated the Louisiana Purchase during his time as minister plenipotentiary to France, and as minister to Spain he negotiated the purchase of the Floridas.  In 1817 he was elected to the first of two terms as president, in a time that was later called “the era of good feelings.” He was the author of the “Monroe Doctorine,” which became the cornerstone of American foreign policy for generations.

Access across the fence to the Monroe birthplace monument

We know comparatively little of James Monroe personally. He stood 6’2”, while his wife was a petite 4’8”.  Thomas Jefferson called him “a man whose soul might be turned wrong-side outwards without discovering a blemish to the world.”  We know that he had a fondness for waffles.

After Monroe retired from public office, he fell on financial hard times. He petitioned Congress for back pay, but President Andrew Jackson blocked the funding of his request; in 1831, he was finally given only half of what he had asked for originally.  On July 4, 1831 – five years to the day after the deaths of his friends John Adams and Thomas Jefferson – James Monroe died.

The James Monroe monument alongside Virginia State Route 205

Neither the man or his birthplace knew much peace after his death: Monroe was buried in New York, but was later exhumed and moved to Richmond. The owner of his birthplace site after the Civil War used the tombstones of the Monroe ancestors as weights for his harrow, and then flung them into the creek when the work was finished.  Over time, the land was parceled into numerous plots and sold. 

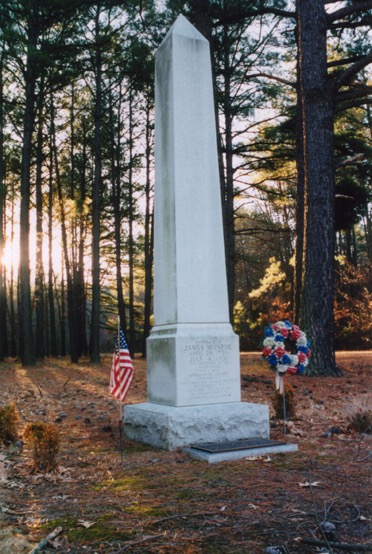
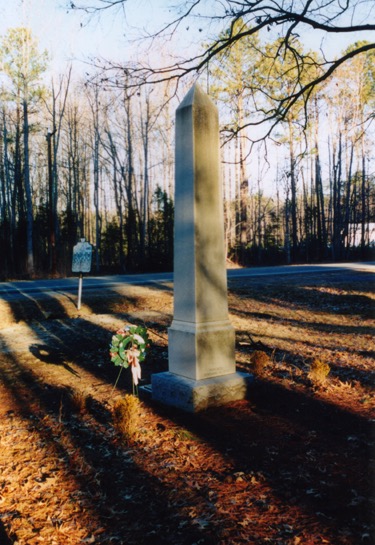
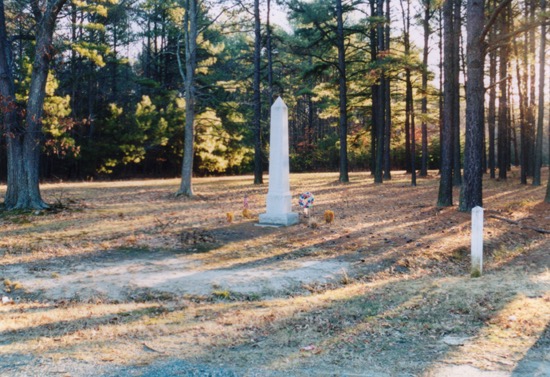
In 1941, a Monroe Birthplace Monument Association was formed, which acquired the area around Monroe’s actual birth site. An access road was built to the site, but the Association’s plans never progressed beyond that stage and in 1973 the land fell to public ownership. For years, various government and private organizations were approached about sponsoring the development of the historic site, but all refused or were unable to raise the needed funds. In 1993, several chapters of the Veterans of Foreign Wars were kind enough to pay for a granite marker at the site, nestled among a grove of trees along the side of State Route 205.

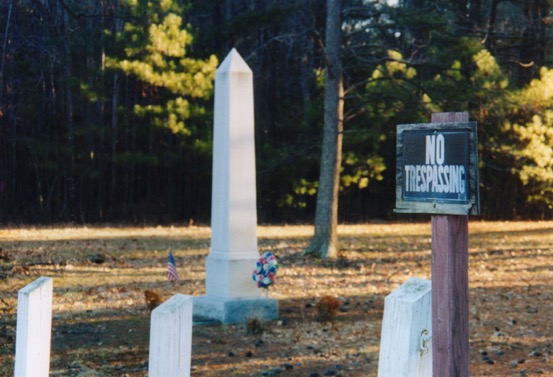
When I visited the site in 1994, there was a certain thrill to the lonely and solemn spot, and a feeling that the site was my little secret. With no noise or other visitors present, it was blissfully easy to envision the area as it once was – a luxury almost never available at most historical sites. But there was also a sense of vacancy, a tangible knowledge that something should be there which was not.

The Monroe birthplace monument in its clearing

I returned to the site this past winter and found that the site remained just as it was a decade ago. But in the intervening years, dedicated area residents had continued to push for something to be done, and it appears now that things are at last changing for the better. Plans were drawn up for a memorial site that would include a nature trail, picnic area and historical signage, and the Westmoreland County government has been awarded a grant to begin developing the site. But the work has not yet begun, and today the site remains just as it was.

The lonely granite marker still stands there as a reminder of both the sadness of the neglect of historical sites and the hope that the work of determined and caring individuals can help to bring that neglect to an end.

How to… Install Linux on a G3 Power Macintosh

By Jeffrey Carl

From MacAddict Magazine, March 1999

You’ve heard the hype about Linux – a free version of the powerful Unix operating system. You’ve heard it makes a great web server or file server; or you’ve heard that it makes a fast workstation. You’ve envisioned yourself being the envy of your friends with an un-crashable OS, doing cool (yet vaguely dirty)-sounding things like “tweaking your kernel.” And, being an unrepentant geek, you can’t wait to play around with it. So you’re ready to think different – really different – and try installing it.

First, the good news – despite what you’ve heard, Linux installation can be a very simple, non-intimidating process. Even better, Linux has become available for most Macintoshes – both PowerPC and 68k. With any luck, you could be up and running in about an hour.

Now, the bad news – Linux support isn’t perfect for all Mac-compatible machines and peripherals. Most importantly, you’re taking off the training wheels here – installing an operating system on your machine which isn’t officially supported, doesn’t come with much documentation, and can require you to mess around with the very guts of your machine in ways you had never imagined were possible. 

Getting ready to install Linux on a Power Macintosh G3

If you’re still with us after reading that last paragraph, then you’re stout of heart and soul – or you’re a glutton for punishment. Either way, let’s get started. For this example, we’ll be installing LinuxPPC 4 from a CD onto a Power Macintosh G3/266, with an external SCSI 1.5 GB hard drive set up as the Linux volume.

1. Get Prepared

1. First, make sure that you have a supported Macintosh for your Linux of choice (see sidebar) and a hard drive you can repartition to make a home for Linux. At least 400 MB of space is required, and 1.2 GB or more is recommended. You can use your MacOS drive to include Linux volumes, but you’ll have to wipe it clean and repartition it first. 

2. Back up all of your files. Really. You can get away without doing this if you’re installing Linux onto a fresh new disk (and you like living on the edge); but if you’re repartitioning your current MacOS drive, you’ll need to do this because you’ll be wiping your disk clean in the process.

2. Partition Your Disk

You’ll need to create several disk partitions for Linux (at least two, and four or five is recommended). This comes from an old Unix tradition of placing files which seldom change (and important system files) on different partitions from frequently-changing user files so that they’re less likely to be corrupted by frequent writes to the hard disk. The minimum number of partitions is two: one for swap (sort of Linux’s virtual memory scratch disk) and one for /(“root,” or your regular filesystem). It is recommended that you create these two partitions, as well as one for /usr (where most of Unix’s programs are installed) and /home (where users’ personal files are stored).

1. Choose a drive-partitioning utility. Your choice here depends on what type of disk you’re going to use (SCSI or IDE/ATA). If you aren’t sure what type of disk you have, consult the documentation that came with your Mac. 

For SCSI disks, you can use the Apple_HD_SC_Setup program which came with your Mac to create the partitions and set them as the correct type (A/UX). If you have a non-Apple disk or a Mac clone, you can use the third-party utility that came with the drive or computer (like FWB Hard Disk ToolKit) for this. If you have an Apple IDE or SCSI drive, you’ll need to use the Apple Drive Setup utility that came with your Macintosh (make sure you have the newest version). If you use Drive Setup (as we’ll be doing here), you’ll also need the pdisk utility (included on the CD) to convert the HFS partitions you create to their proper type.

2. Open Drive Setup utility and choose the disk you’ll be partitioning. Note that you can’t use Drive Setup from your startup disk; you’ll have to partition another drive, or boot from your MacOS system CD.

3. Get the Tools

First, you’ll need to get Linux and the utilities for installing it. 

1. One of the nice things about “free operating systems” is that they’re just that – free. If you have a fast Internet connection, you can do an installation via FTP from the LinuxPPC site (ftp://ftp.linuxppc.org) or one of its mirrors, and it’s absolutely free. However, it may be easier for most users to order a CD from the good folks at LinuxPPC (http://www.linuxppc.org), which includes a recent distribution plus other programs and goodies for $XX plus shipping. In addition, if you buy a CD, you’re completely free to share it with as many people as you like.

2. Install BootX (included on your LinuxPPC CD), the utility for switching back and forth from MacOS to Linux when you boot your computer. Simply drag the BootX control panel onto your system folder to install it (you’ll need to reboot before you can use it).

If this doesn’t work for you, you can manipulate which OS you boot into through BootVars (http://url.goes.here, or included on the CD), a control panel which allows you to manipulate your Mac’s Open Firmware. However, this isn’t recommended – mucking around with Open Firmware has reduced more than one formerly confident Mac Jedi to bingeing on non-prescription cold medications in frustration (also, this option is no longer officially supported by LinuxPPC).

3. Drag two files from the CD onto your System Folder: vmlinux and ramdisk.image.gz. These files should stay at the “top” level of your System Folder (not inside any folders inside the System Folder).

4. Begin the Installation

1. Insert the LinuxPPC CD into your CD-ROM drive, and open your BootX control panel (double-click it or select it from your Control Panels menu in the Apple Menu).

2. Leave the “root device” field blank. Check the “Use RAM Disk” and “No video driver” options.

3. Click the “Linux” button to reboot your computer into the Linux Red Hat Installer.

5. Use the Red Hat Installer

[Sidebar]

Resources

The LinuxPPC website:

http://www.linuxppc.org

The LinuxPPC Installation Guide:

http://www.linuxppc.org/userguide

The MkLinux website:

http://www.mklinux.apple.com

The Linux Mac68k Project website:

http://www.mac.linux-m68k.org

The Linux on PowerPC newsgroup: comp.os.linux.powerpc

[Sidebar]

Which Macs Can I Get a Linux For?

LinuxPPC 5.0 supports:

Any PCI-based Power Mac, PowerBook or Macintosh clone (including iMac), as well as BeBoxes. “Blue-and-white G3” not supported yet. 

MkLinux 3.0 supports:

NuBus-Based Power Macs (6100, 7100, 8100, 9100), PCI Power Macs (7200, 7500, 7600, 8500, 9500, 7300, 8600, 9600), PCI Performas (4400, 5400, 5500, 6400, 6500), 20th Aniversary Mac, Desktop and Minitower Power Mac G3 (but not “blue-and-white G3” yet), PowerBooks (5300, 1400, 2400, 3400, G3, G3 Series)

LinuxMac68k supports:

Most 68030- and 68040-based Macs (but not most 68LC040-based). 68020-based Macs with a FPU (Mac II, or those with a FPU emulator).

For complete, up-to-date lists, please refer to the website of your Linux of choice.